Tuesday, November 24, 2015

Want. Need. Wear. Read.

My mother in law does this! focusing gifts on giving to others, and giving 4 gifts -  one of each: want, need, wear, read:


Several years ago I learned of an idea to simplify Christmas and make it more meaningful. It is simply giving your children only four gifts:

1- Something they Want
2-Something they Need
3-Something to Wear
4- Something to Read

I don't know about you but we have a lot of stuff!  This concept has not only cut down on Christmas clutter but it has helped my girls appreciate and remember their gifts.  It also helps them focus more on others instead of themselves.

I have heard of many others starting this tradition and loved these quotes from them:

"A simple Christmas is my favorite. It keeps the focus on the together time and the birth of Christ."

"Love this! Great way to focus on what really matters during the holiday."

"The Christmas List: 4-Things. I'm not sure how many of you feel the same way I do...but Christmas seems like too much wrapping paper and not enough of the important stuff. So this is how we roll in our house, it has worked great for the past few years and now the kids really look forward to making their list. They start by putting everything that they can think of wanting on their list, then they whittle it down to four things."

An amazing extension on the "Want, need, wear, read" Christmas gift idea, taking it a step further to help children give a little of their own at Christmas. Beautiful.
An amazing extension on the "Want, need, wear, read" Christmas gift idea, taking it a step further to help children give a little of their own at Christmas. Beautiful.:

Tuesday, November 17, 2015

Healthy Chicken Noodle Soup


I love chicken noodle soup! This recipe is a little more low calorie than my Grandma's Hearty Chicken Noodle Soup I posted before. This one is very simple to make. My mother-in-law makes her Chicken Noodle Soup very similarly. She doesn't use a recipe or anything, however. I adapted this recipe from my cooking class I took like 5 years ago. We love it! We love it so much we double it. So this recipe makes about 12 servings. If you want less just cut the recipe in half.

Ingredients:

16 Cups of Chicken Broth or 2 48 oz. boxes
4 Celery Stalks diced up small
4 Regular Carrots halved and diced or about 25 baby carrots diced up
2 yellow onions finely diced
1 Rotisserie Chicken Breast Chopped Up into bite sized chunks
4 oz. of dried wide egg noodles
3 Tb. of Fresh Parsley or 3 tsp. of dried parsley
Salt and Pepper to taste

Directions:

Chop up all your veggies. I like to dice the onions in my little cuisniart to save my make-up :).


Get your chicken broth simmering. Add the veggies in and stir and simmer getting them tender.

Add in your noodles and cook according to the directions and until they are tender.

Add in your chopped up chicken.

Add in 2 tsp. of dried parsley or 2 Tb. of fresh parsley.

Add Salt and Pepper to taste

Serve in individual bowls topping with a bit more parsley.

Yum!

Enjoy!

Monday, November 16, 2015

Rice Bags Rock

We LOVE rice bags!  We make them in all shapes and sizes. Heat them in the microwave for 2 to 3 minutes and take them to bed with you for aches or to keep you warm:)
I made one that fits perfectly into the front pocket of my daughters hoodie and she loves to use it for cramps.

You can use any kind of fabric but my favorite is flannel.  This rice bag was made from a pair of old pjs. I have made them out of cotton and fleece and a mix of one side cotton and one said fleece.


Cut the fabric the size you want it be.  I usually make them about 4 inches by 10 inches. 
 They are great if they are smaller or larger  It's just a personal preference.


Put your fabric right sides together and sew around three sides 
the width of the foot on the machine, leaving one side open for filling with rice.


After sewing three sides, clip the corners diagonally to
 help it look nice after you turn it back right side out. 


Fill it with as much rice as you'd like


turn the top open edge inside and pin it for easier stitching


stitch the opening closed the width of the machine foot again


Clip the threads and your rice bag is complete:) They make cute gifts.
  I just made 3 for my neighbor for her birthday because they only had one
 and her daughter took it to college with her:)  

One night I caughter my 11 year old using 3 rice bags in bed at the same time!

You can also freeze them to use as a cold comfort too.

*when in a pinch, fill a long sock with rice and tie it off with a knot,


I'm a little comfort bag-
just keep me by your chair
two or three minutes in the microwave
and I'll warm you everywhere
or freeze me for a little while
and fix that boo boo up in style
instead of a compress made of ice 
you'll find this pillow extra nice.


Wednesday, November 11, 2015

ChUnkY SaLsA

ChUnKy SaLsA


I have been making this super easy salsa for years and everyone seems to really enjoy it. Even my 7 year old daughter eats it by the spoon-full. 
What you'll need

  • 8-12 tomatoes (depending on size). I usually just buy the ones that are on sale, Or if I'm super lucky I have fresh ones from the garden. 
  • 1 big bunch or 2 small bunches of Cilantro. 
  • 1 T (or so) of Garlic
  • 1 Medium Purple Onion
  • Salt to Taste
Wash and chop everything up! If you have a chopper you can put the cilantro and the onion in it, but don't chop the tomatoes in it. You need to do those by hand to get that really chunky consistency. Otherwise it turns into mush. 
If you're not growing your own garlic, may I suggest to buy it pre-minced? It's the most fabulous thing and saves you loads of time. 

After everything is chopped and mixed into a bowl, let it sit for a while in the fridge. It will settle and then you can tell if you need more salt or garlic. Most of the time ours doesn't make it to the fridge. In fact, I'm eating mine right now. 

I hope you like it .
Lots of Love,
Nicole


Tuesday, November 10, 2015

Dinner in a pumpkin

Years ago our friends had us over for dinner in the fall and made us this fun dinner and it has become a happy tradition

Dinner in a pumpkin


Cut lid from medium pumpkin, scrape out the inside of the pumpkin and discard what you scrape out. 


 Chop onion. I love the pampered chef chopper. Contact my friend Tina to purchase:) 801-380-9498. Her website is
https://www.pamperedchef.com/pws/tinafairbourn


This is another pampered chef tool I love called the mix and chop.  It breaks up the hamburger into fine pieces and helps brown it so nicely. 


 brown hamburger with onion, salt and pepper


Mix soy sauce, brown sugar, mushrooms, cream of chicken soup and cooked rice together. 


Mix together with hamburger and onion and scoop 
mixture into pumpkin.


Place lid on pumpkin. Place pumpkin on foil lined cookie sheet and bake in 350 oven for 1-1/2 hours or until pumpkin is tender because we eat that part too with butter and salt.


I usually have my kids draw a face on both sides of it before baking it and they love that. 


The pumpkin darkens up nice and sometimes it oozes juice so be sure to line your pan. 


add a little butter and salt or brown sugar to your pumpkin and it is delicious!

Dinner In A Pumpkin
  
1 Medium size pumpkin, about 4 pounds 
1-1/2 lb lean ground beef
 1 chopped onion 
 1 tsp salt 
 1/4 tsp pepper 
 1/4 cup soy sauce
 2 TB brown sugar 
 2 cup cooked rice 
*the original recipe calls for a can of mushrooms but we don't love them so we leave them out:)
       
 Cut lid from pumpkin, scrape out the inside of the pumpkin good and discard what you scrape out. 
In a large skillet brown hamburger and onion. 
Mix salt, pepper, soy sauce, brown sugar, mushrooms, cream of chicken soup and cooked rice together. 
Mix together with hamburger and onion. Mix well and place mixture into pumpkin
Place lid on pumpkin. Place pumpkin on foil lined cookie sheet and bake in 350 oven for 1-1/2 hours. 
When you spoon your portion, be sure and scrape and get some of the yummy cooked pumpkin too.

Friday, November 6, 2015

Blanket Making for Dummies

I did not get blessed with my sisters skills in the sewing department.  However, I love to do it, sometimes, and have attempted many times to make stockings, quilts, and blankets.  When it comes to sewing on patches for my boys scouts shirts, I usually hand that task off to my mom and mother in law.

Two of my friends recently had babies.  So I thought I would pull out my sewing machine and make a few blankets.  One of my friends had a girl, so of course I had a blast picking out girl fabric!  (I only have 5 boys).  So here is a step by step way to make an EASY blanket.  And I mean, REALLY EASY!  For this blanket, I got 2 different fabrics that were 1 yard each.  Perfect for a little baby to be bundled in.


 First lay the fabric out with the RIGHT sides together.  Pin all around.  I only pinned about 3 pins on each side.


Sew with a straight line around the fabric.  I am sewing about a half an inch in.


Sew all the way around leaving about 3-4 inches open.  This way you can pull the blanket out and turn it the right way.

 I don't know if this is necessary, but before I pulled the fabric out, I went around the whole blanket, especially the corners, and cut slits in.  This way it just lays flat and has a nice clean corner when it's all finished.


 Once you pull the fabric out and get the blanket to how you want it, take that 3-4 inches of fabric that you didn't sew yet and sew together.


Here is the finished product.  This blanket only took me about 15 minutes to make!  It turned out so cute and is really easy to make.  Roll it up and wrap it with some tulle and give away to someone!


Wednesday, November 4, 2015

Re-Doing Your Kitchen Cupboards

I spend most of my time in the kitchen. Not because I really love cooking, but because it takes me all day long to feed 4 kids and 1 husband 3 times a day. Just kidding.....kind of. I am no expert at re-doing cupboards, but I have done them in two kitchens now and I have people asking me about how I do it, so here goes.

Step 1: SAND. Take all the cupboard doors off and sand everything. It's really pretty simple and I did all of these steps by myself.  You want to rough up the edges of the cupboards without the doors on and then take a sander to the doors too. This will make it easier for the paint to adhere.


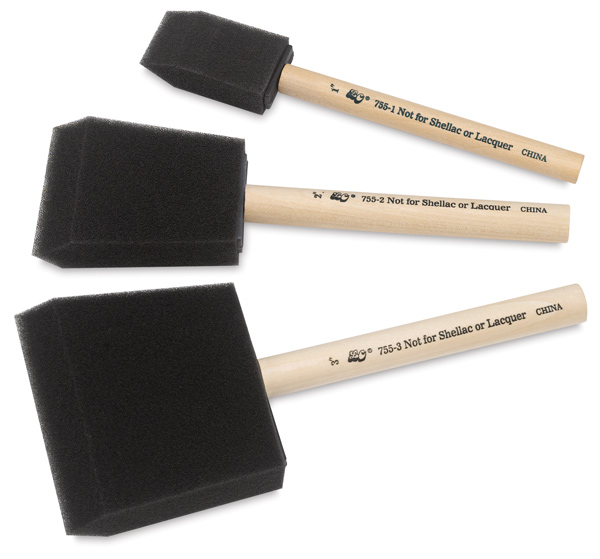
Step 2: PAINT. You want to get a really good, brand name paint. I like the paint and primer combined because it is thicker and doesn't need as many coats. I have used paint that I just had extra of too so that really kept the cost down. I have had 2 pretty small kitchens so I needed less than a gallon per kitchen. You want to put on several coats, but wait until the paint is dry before applying another. I like to use sponge brushes. They don't last as long, but they don't leave as many brush marks either. Make sure you get all the edges in the kitchen that are left without the doors on.
Step 3: SAND AGAIN. If you want a really great finish on the cupboard doors sand them again after all the coats of paint are dry. You will need several more coats than if you're not sanding at the end. If you put a different color underneath and sand harder in some areas then others you can get a really rough, two tone look. (If that's the look you want)

Step 4: STAIN. I have done two different things when it comes to staining the cupboards. (No stain is fine too) The first kitchen I did I put stain all over the entire door and all the trim and then wiped it off. It was cool, but after a while I thought it just looked dirty. The most recent kitchen I did a friend showed me how to just stain the edges and then wipe off the excess with baby wipes. I liked that much better.

Step 5: PROTECT IT. You are going to want to put clear protective coating on everything. You will want several coats if you have children especially. You will want to wait for each coat to dry before applying another one. I have used Poly Urethane and Poly Acrylic before. I prefer Poly Acrylic because the Poly Urethane yellows after a time.

Step 6: FINISHING TOUCHES. Go buy some hardware for your cupboards. It really makes a difference. Those huge, blank stretches of wood without cupboard doors could use some molding and some bead board too. Just make sure you do just as many coats of paint and finish on the bead board  and molding as you did the cupboards.

That's it! Re-doing the cupboards has cost me less than $80 each time and I really love how it cleans up the look of the kitchen. For me it makes it much more peaceful and I enjoy being in it so much more. I hope this helps.
Lots of love, Nicole