Showing posts with label do it yourself. Show all posts

Monday, November 16, 2015

Rice Bags Rock

We LOVE rice bags!  We make them in all shapes and sizes. Heat them in the microwave for 2 to 3 minutes and take them to bed with you for aches or to keep you warm:)
I made one that fits perfectly into the front pocket of my daughters hoodie and she loves to use it for cramps.

You can use any kind of fabric but my favorite is flannel.  This rice bag was made from a pair of old pjs. I have made them out of cotton and fleece and a mix of one side cotton and one said fleece.


Cut the fabric the size you want it be.  I usually make them about 4 inches by 10 inches. 
 They are great if they are smaller or larger  It's just a personal preference.


Put your fabric right sides together and sew around three sides 
the width of the foot on the machine, leaving one side open for filling with rice.


After sewing three sides, clip the corners diagonally to
 help it look nice after you turn it back right side out. 


Fill it with as much rice as you'd like


turn the top open edge inside and pin it for easier stitching


stitch the opening closed the width of the machine foot again


Clip the threads and your rice bag is complete:) They make cute gifts.
  I just made 3 for my neighbor for her birthday because they only had one
 and her daughter took it to college with her:)  

One night I caughter my 11 year old using 3 rice bags in bed at the same time!

You can also freeze them to use as a cold comfort too.

*when in a pinch, fill a long sock with rice and tie it off with a knot,


I'm a little comfort bag-
just keep me by your chair
two or three minutes in the microwave
and I'll warm you everywhere
or freeze me for a little while
and fix that boo boo up in style
instead of a compress made of ice 
you'll find this pillow extra nice.


Friday, November 6, 2015

Blanket Making for Dummies

I did not get blessed with my sisters skills in the sewing department.  However, I love to do it, sometimes, and have attempted many times to make stockings, quilts, and blankets.  When it comes to sewing on patches for my boys scouts shirts, I usually hand that task off to my mom and mother in law.

Two of my friends recently had babies.  So I thought I would pull out my sewing machine and make a few blankets.  One of my friends had a girl, so of course I had a blast picking out girl fabric!  (I only have 5 boys).  So here is a step by step way to make an EASY blanket.  And I mean, REALLY EASY!  For this blanket, I got 2 different fabrics that were 1 yard each.  Perfect for a little baby to be bundled in.


 First lay the fabric out with the RIGHT sides together.  Pin all around.  I only pinned about 3 pins on each side.


Sew with a straight line around the fabric.  I am sewing about a half an inch in.


Sew all the way around leaving about 3-4 inches open.  This way you can pull the blanket out and turn it the right way.

 I don't know if this is necessary, but before I pulled the fabric out, I went around the whole blanket, especially the corners, and cut slits in.  This way it just lays flat and has a nice clean corner when it's all finished.


 Once you pull the fabric out and get the blanket to how you want it, take that 3-4 inches of fabric that you didn't sew yet and sew together.


Here is the finished product.  This blanket only took me about 15 minutes to make!  It turned out so cute and is really easy to make.  Roll it up and wrap it with some tulle and give away to someone!


Wednesday, November 4, 2015

Re-Doing Your Kitchen Cupboards

I spend most of my time in the kitchen. Not because I really love cooking, but because it takes me all day long to feed 4 kids and 1 husband 3 times a day. Just kidding.....kind of. I am no expert at re-doing cupboards, but I have done them in two kitchens now and I have people asking me about how I do it, so here goes.

Step 1: SAND. Take all the cupboard doors off and sand everything. It's really pretty simple and I did all of these steps by myself.  You want to rough up the edges of the cupboards without the doors on and then take a sander to the doors too. This will make it easier for the paint to adhere.


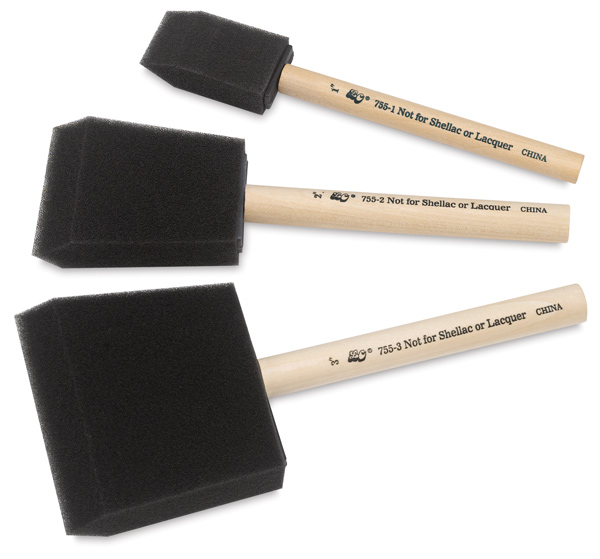
Step 2: PAINT. You want to get a really good, brand name paint. I like the paint and primer combined because it is thicker and doesn't need as many coats. I have used paint that I just had extra of too so that really kept the cost down. I have had 2 pretty small kitchens so I needed less than a gallon per kitchen. You want to put on several coats, but wait until the paint is dry before applying another. I like to use sponge brushes. They don't last as long, but they don't leave as many brush marks either. Make sure you get all the edges in the kitchen that are left without the doors on.
Step 3: SAND AGAIN. If you want a really great finish on the cupboard doors sand them again after all the coats of paint are dry. You will need several more coats than if you're not sanding at the end. If you put a different color underneath and sand harder in some areas then others you can get a really rough, two tone look. (If that's the look you want)

Step 4: STAIN. I have done two different things when it comes to staining the cupboards. (No stain is fine too) The first kitchen I did I put stain all over the entire door and all the trim and then wiped it off. It was cool, but after a while I thought it just looked dirty. The most recent kitchen I did a friend showed me how to just stain the edges and then wipe off the excess with baby wipes. I liked that much better.

Step 5: PROTECT IT. You are going to want to put clear protective coating on everything. You will want several coats if you have children especially. You will want to wait for each coat to dry before applying another one. I have used Poly Urethane and Poly Acrylic before. I prefer Poly Acrylic because the Poly Urethane yellows after a time.

Step 6: FINISHING TOUCHES. Go buy some hardware for your cupboards. It really makes a difference. Those huge, blank stretches of wood without cupboard doors could use some molding and some bead board too. Just make sure you do just as many coats of paint and finish on the bead board  and molding as you did the cupboards.

That's it! Re-doing the cupboards has cost me less than $80 each time and I really love how it cleans up the look of the kitchen. For me it makes it much more peaceful and I enjoy being in it so much more. I hope this helps.
Lots of love, Nicole

Thursday, October 29, 2015

Rustic Lemonade Stand

My friend asked me to help decorate her daughter's outdoor reception this past May. The Bride really wanted a Lemonade Stand for part of her decor and use as a display and serving area. I started googling Lemonade Stand Ideas and all of them seemed to require too much effort to make the entire base first and then add the wood and top, so I came up with this idea.....

I had  bought this "blind" cabinet in March from the KSL classified ads because I wanted to try to make a kitchen island out of it.  It's 24 inches deep so I felt that it was too wide for the space I had.  It was only $20 so I didn't feel bad about not using it and donating it to our garage to use as storage.  

We had weathered cedar fencing from 3 fence panels that we had replaced last fall.   So.....I put the two things together and came up with my solution for the Lemonade Stand!  


The main area of the fence panels is all tongue and groove cedar. We wrapped the back and sides of the cabinet with the tongue and groove, using my neighbor's nail gun to adhere it on.  We also spray painted the front and sides black in case any gaps would show thru.  I'm thankful Scott thought of that because we had plenty of gaps!  

We had left over weathered wood from my dad's wood pile that we had used to make the Barn Doors for the Ward Fall Ho' Down.  We used that for the top/counter of the stand and also the "sign".  Scott even figured out how to notch the sides of the sign into the counter so it would all be flush. Because of all the wood on it, it is heavy.  I want to add locking casters to help maneuver it better.  Someday those will be put on. ;) 


Finished Front View
Back View
I love that my Lemonade Stand is made out of a cabinet because it has a drawer and a closing cupboard with a shelf to store things on/in. The right side is big enough to hold my cooler for ice! 


 P.S I have the drawer front and a burlap curtain for the right side.  Hopefully I'll be able to add those pics soon!