Wednesday, November 11, 2015

ChUnkY SaLsA

ChUnKy SaLsA


I have been making this super easy salsa for years and everyone seems to really enjoy it. Even my 7 year old daughter eats it by the spoon-full. 
What you'll need

  • 8-12 tomatoes (depending on size). I usually just buy the ones that are on sale, Or if I'm super lucky I have fresh ones from the garden. 
  • 1 big bunch or 2 small bunches of Cilantro. 
  • 1 T (or so) of Garlic
  • 1 Medium Purple Onion
  • Salt to Taste
Wash and chop everything up! If you have a chopper you can put the cilantro and the onion in it, but don't chop the tomatoes in it. You need to do those by hand to get that really chunky consistency. Otherwise it turns into mush. 
If you're not growing your own garlic, may I suggest to buy it pre-minced? It's the most fabulous thing and saves you loads of time. 

After everything is chopped and mixed into a bowl, let it sit for a while in the fridge. It will settle and then you can tell if you need more salt or garlic. Most of the time ours doesn't make it to the fridge. In fact, I'm eating mine right now. 

I hope you like it .
Lots of Love,
Nicole


Tuesday, November 10, 2015

Dinner in a pumpkin

Years ago our friends had us over for dinner in the fall and made us this fun dinner and it has become a happy tradition

Dinner in a pumpkin


Cut lid from medium pumpkin, scrape out the inside of the pumpkin and discard what you scrape out. 


 Chop onion. I love the pampered chef chopper. Contact my friend Tina to purchase:) 801-380-9498. Her website is
https://www.pamperedchef.com/pws/tinafairbourn


This is another pampered chef tool I love called the mix and chop.  It breaks up the hamburger into fine pieces and helps brown it so nicely. 


 brown hamburger with onion, salt and pepper


Mix soy sauce, brown sugar, mushrooms, cream of chicken soup and cooked rice together. 


Mix together with hamburger and onion and scoop 
mixture into pumpkin.


Place lid on pumpkin. Place pumpkin on foil lined cookie sheet and bake in 350 oven for 1-1/2 hours or until pumpkin is tender because we eat that part too with butter and salt.


I usually have my kids draw a face on both sides of it before baking it and they love that. 


The pumpkin darkens up nice and sometimes it oozes juice so be sure to line your pan. 


add a little butter and salt or brown sugar to your pumpkin and it is delicious!

Dinner In A Pumpkin
  
1 Medium size pumpkin, about 4 pounds 
1-1/2 lb lean ground beef
 1 chopped onion 
 1 tsp salt 
 1/4 tsp pepper 
 1/4 cup soy sauce
 2 TB brown sugar 
 2 cup cooked rice 
*the original recipe calls for a can of mushrooms but we don't love them so we leave them out:)
       
 Cut lid from pumpkin, scrape out the inside of the pumpkin good and discard what you scrape out. 
In a large skillet brown hamburger and onion. 
Mix salt, pepper, soy sauce, brown sugar, mushrooms, cream of chicken soup and cooked rice together. 
Mix together with hamburger and onion. Mix well and place mixture into pumpkin
Place lid on pumpkin. Place pumpkin on foil lined cookie sheet and bake in 350 oven for 1-1/2 hours. 
When you spoon your portion, be sure and scrape and get some of the yummy cooked pumpkin too.

Friday, November 6, 2015

Blanket Making for Dummies

I did not get blessed with my sisters skills in the sewing department.  However, I love to do it, sometimes, and have attempted many times to make stockings, quilts, and blankets.  When it comes to sewing on patches for my boys scouts shirts, I usually hand that task off to my mom and mother in law.

Two of my friends recently had babies.  So I thought I would pull out my sewing machine and make a few blankets.  One of my friends had a girl, so of course I had a blast picking out girl fabric!  (I only have 5 boys).  So here is a step by step way to make an EASY blanket.  And I mean, REALLY EASY!  For this blanket, I got 2 different fabrics that were 1 yard each.  Perfect for a little baby to be bundled in.


 First lay the fabric out with the RIGHT sides together.  Pin all around.  I only pinned about 3 pins on each side.


Sew with a straight line around the fabric.  I am sewing about a half an inch in.


Sew all the way around leaving about 3-4 inches open.  This way you can pull the blanket out and turn it the right way.

 I don't know if this is necessary, but before I pulled the fabric out, I went around the whole blanket, especially the corners, and cut slits in.  This way it just lays flat and has a nice clean corner when it's all finished.


 Once you pull the fabric out and get the blanket to how you want it, take that 3-4 inches of fabric that you didn't sew yet and sew together.


Here is the finished product.  This blanket only took me about 15 minutes to make!  It turned out so cute and is really easy to make.  Roll it up and wrap it with some tulle and give away to someone!


Wednesday, November 4, 2015

Re-Doing Your Kitchen Cupboards

I spend most of my time in the kitchen. Not because I really love cooking, but because it takes me all day long to feed 4 kids and 1 husband 3 times a day. Just kidding.....kind of. I am no expert at re-doing cupboards, but I have done them in two kitchens now and I have people asking me about how I do it, so here goes.

Step 1: SAND. Take all the cupboard doors off and sand everything. It's really pretty simple and I did all of these steps by myself.  You want to rough up the edges of the cupboards without the doors on and then take a sander to the doors too. This will make it easier for the paint to adhere.


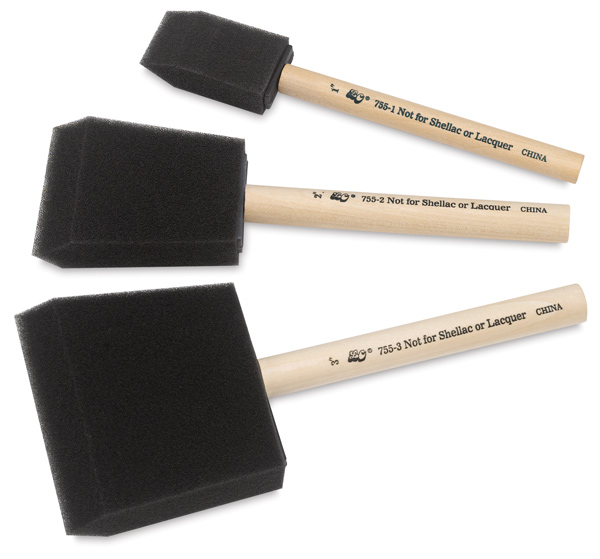
Step 2: PAINT. You want to get a really good, brand name paint. I like the paint and primer combined because it is thicker and doesn't need as many coats. I have used paint that I just had extra of too so that really kept the cost down. I have had 2 pretty small kitchens so I needed less than a gallon per kitchen. You want to put on several coats, but wait until the paint is dry before applying another. I like to use sponge brushes. They don't last as long, but they don't leave as many brush marks either. Make sure you get all the edges in the kitchen that are left without the doors on.
Step 3: SAND AGAIN. If you want a really great finish on the cupboard doors sand them again after all the coats of paint are dry. You will need several more coats than if you're not sanding at the end. If you put a different color underneath and sand harder in some areas then others you can get a really rough, two tone look. (If that's the look you want)

Step 4: STAIN. I have done two different things when it comes to staining the cupboards. (No stain is fine too) The first kitchen I did I put stain all over the entire door and all the trim and then wiped it off. It was cool, but after a while I thought it just looked dirty. The most recent kitchen I did a friend showed me how to just stain the edges and then wipe off the excess with baby wipes. I liked that much better.

Step 5: PROTECT IT. You are going to want to put clear protective coating on everything. You will want several coats if you have children especially. You will want to wait for each coat to dry before applying another one. I have used Poly Urethane and Poly Acrylic before. I prefer Poly Acrylic because the Poly Urethane yellows after a time.

Step 6: FINISHING TOUCHES. Go buy some hardware for your cupboards. It really makes a difference. Those huge, blank stretches of wood without cupboard doors could use some molding and some bead board too. Just make sure you do just as many coats of paint and finish on the bead board  and molding as you did the cupboards.

That's it! Re-doing the cupboards has cost me less than $80 each time and I really love how it cleans up the look of the kitchen. For me it makes it much more peaceful and I enjoy being in it so much more. I hope this helps.
Lots of love, Nicole

Tuesday, November 3, 2015

Happy Shipping!

This is a short n' sweet post but something you will LOVE! I send a lot of packages because I had two missionaries out at the same time for about 9 months and now my daughter and her little family live in MN.

This is an ingenious trick to send more for less.


A lady at the post office taught me this trick and I have realized very few people know about it!


You can turn a flat rate envelope into a pouch to increase the capacity. It holds a lot more than a small flat rate box ($6) and about as much as a medium flat rate ($13) for only $6. So worth it!


I do this all the time! Just fold the bottom both ways, and flatten it out from the inside, folding the corners and taping them up into a rectangular bottom.


Secure with lots of tape. Happy shipping!

Sunday, November 1, 2015

Prayer


"Little children, young people, and adults alike, please believe how very much your loving Heavenly Father wants to bless you. But because He will not infringe upon our agency, we must ask for His help. This is generally done through prayer. Prayer is one of the most precious gifts of God to man." -The Privilege of Prayer, J Devn Cornish of the 70

Years ago, when I was still new to the Church (Church of Jesus Christ of Latter Day Saints) someone said to me that Heavenly Father didn't care about silly decisions. For some reason the statement really bothered me. I worried over it for weeks. Didn't he tell us to pray always? Aren't we supposed to go to Him to feel peace and receive answers for our lives here on Earth? Why wouldn't he care? What if it matters to us in this moment? 
So I decided to that I would pray. I would pray to know if He really cared. What if a decision didn't really have an Eternal impact on our lives? Would it still matter that we go to Him for answers? 
The answer I received was a resounding YES! Of course it matters! Even if it isn't a matter of eternal importance He still cares about us and how we feel here on Earth. Pray for peace, pray for comfort, pray for answers, pray for patience, pray for silly decisions and important ones. Heavenly Father loves you and wants you to communicate with him. He wants you to know you are loved and that he is aware of your situation. 
I am grateful for His love and His peace. I am so grateful to be able to teach my children to go to Him in times of need. I would encourage you to do the same. 
Lots of Love,
Nicole


Ponderizing Parenting

I have been working on my patience as a mom. My little girls have such sweet, innocent spirits and I don't want to break them by yelling at them all day long. I want to try to always have the spirit with me, even when they have dumped all my q-tips out and covered them with soap :). I heard a quote somewhere that "It takes 5 minutes to clean up spilled milk, but a lot longer to heal a broken heart". I am totally summarizing there and could be way off, but you get what I mean! Whenever I do lose my patience I immediately regret it and know that it did nothing but hurt and not help.

Last week I did my first ponderizing patience scripture you can see here.

This week the scripture I chose is:

Moroni 7:45
And charity suffereth long, and is kind, and envieth not, and is not puffed up, seeketh not her own, is not easily provoked, thinketh no evil, and rejoiceth not in iniquity but rejoiceth in the truth, beareth all things, believeth all things, hopeth all things, endureth all things.


I love this scripture for more than just parenting. This will help me be a better wife! This will help me be a better friend, sister, daughter, and just person in general.

Also I like how "charity" is female :)

What scripture are you ponderizing this week?