Wednesday, December 30, 2015

Easy Chocolate Chip Peanut Butter Bars


I adapted this delicious and easy recipe from All Recipes December/January 2016 magazine. They are so yummy!

Easy Chocolate Chip Peanut Butter Bars

Ingredients:

1 3/4 cups of flour
1 1/4 cups packed light brown sugar
3/4 cup peanut butter
1 stick of butter, softened
3 Tb. milk
1 large egg
1 Tb. vanilla extract
3/4 tsp. salt
3/4 tsp. baking soda
1+ cup of chocolate chips (I used Guittard Milk Chocolate)

Directions:

1. Mix butter, peanut butter, and brown sugar together until nicely blended. Preheat your oven to 375*.
2. Line a 9 x 13 baking dish with aluminum foil, leaving a 2 inch overhang on the edges.Then spray with bakers joy or another nonstick spray.
3. Add in milk, vanilla, and egg to your butter/sugar mixture. (I totally forgot to add the milk and mine still turned out good).

4. Whisk together flour, salt, and baking soda. Carefully add to your dough and mix together.

5. Add in chocolate chips, mixing to incorporate them throughout the dough.
6. Evenly press the dough into your pan.
7. Bake for 20-25 minutes until a toothpick comes out clean. Let cool on a baking rack for another 20 minutes.
8. Lift out of the pan and then cut into bars.

Enjoy!

Thanks for reading!

Sunday, December 27, 2015

Chocolate Crinkle Cookies


I made these easy and delicious cookies for my nephew's mission farewell. I got the recipe from my December/January All Recipes magazine :). Super yummy! They do take a few hours to cool in between making the dough and baking, so keep that in mind!

Chocolate Crinkle Cookies:

Ingredients:
1 Cup Unsweetened Cocoa Powder
2 Cups Granulated Sugar
1/2 Cup of Vegetable Oil
4 Large Eggs
2 teaspoons Vanilla Extract
2 Cups of Flour
2 teaspoons of Baking Powder 
1/2 teaspoon salt
3/4 cup powdered sugar

Directions:

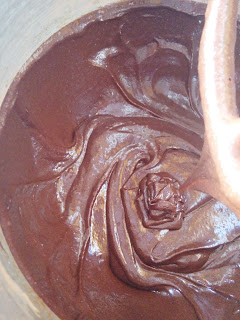
1. Mix together cocoa, granulated sugar, and oil in the bowl of your mixer.


2. Add in eggs 1 at a time and then the vanilla. I like to do this while it is mixing.
3. Combine the flour, baking powder, and salt in another bowl and whisk together.
4. Add the flour mixture to the cocoa mixture and mix together.
5. Cover and refrigerate for 4-8 hours. Or overnight.
6. Using a melon baller or a small cookie scooper, scoop out the dough and roll into balls and then cover in powdered sugar. Put on a prepared baking sheet about 1 and 1/2 inches apart. Bake at 350* for about 12 minutes.
8. Let sit on baking sheet for about 2 minutes after taking them out of the oven then transfer them to a cooling rack with a slotted metal spatula for best results. Let cool for about 15 minutes before storing!
Enjoy!

Thanks for reading!

Monday, December 14, 2015

Delicious Spanish Rice

So Sorry I forgot to post this when I did the enchiladas.  We LOVE this Spanish Rice that we call Cindy's Rice because my awesome friend Cindy gave it to me.  I watched her cute mom make it when we lived in Arizona and she is an awesome cook!

Cindy’s Rice
2 cups uncooked rice
2 TB oil
1 cup tomato sauce
4 cups water
1-2 garlic cloves, pressed
4 tsp chicken bouillon granules.  (If using cubes, I unwrap them and put them in a baggie and smash them with a mallet or you can put them in the microwave with part of the water to dissolve them)
Optional: A bit of Fresh or dried cilantro 
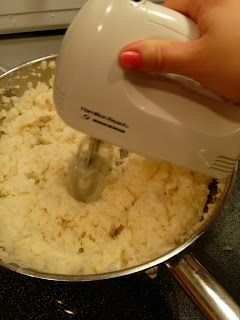
Heat the oil for 5 minutes on medium high heat and then add rice.  Fry, stirring almost constantly until it is browned a little. Pour in everything else and turn down heat to let it simmer covered for 20 minutes.

I took step by step pictures and can't find the now but here is what the finished product looks like.  Enjoy!


Thursday, December 3, 2015

Meaningful Family Tradtions

When Mike and I started our family we really wanted to have family traditions that were meaningful and also fun. We have only been parents for 12 years, and we do a lot of tweaking, but here are some of the things I've observed about family traditions.

Incorporate your childhood
Our kids love it when we do something as a family that we did when Mike or I were kids. They love visiting the hollow where Mike played as a little boy and they love it when we do holiday traditions that our families did.
We decided to do  Pajamas on Christmas Eve. That was something that my family did when I was little and our kids seem to love it. I know families also give their kids Christmas pajamas on Thanksgiving so they can enjoy them all season.
Mike's family has always done the Nativity on Christmas Eve. I love our kids getting dressed up with their cousins to recreate the night Christ was born. We have used towels and robes and blankets to dress everyone up before. My wonderful sisters-in-law made amazing costumes a few years ago and that has been really fun too.

Go with what's important to you
There are so many things that you could do with your family. It is very overwhelming to get on pintrest and try to figure out what would be the most fun or the most meaningful. YOU DON'T HAVE TO DO EVERYTHING! Not only that, but you don't have time to do everything either. I feel like it's important to teach our kids to simplify and to enjoy the things they're doing instead of feeling like a crazy person trying to be "the best mom ever."
Every year we have the kids decorate their tree (we have 2). One is a cute, themed tree that sits in the front window, but the other sits in our living area that we spend most of our time in. That tree is covered in ornaments that they made themselves and little things that represent Christ. The tree that has all those ornaments on it is a tree that Mike and I got on our first Christmas together. It is fiber optic and totally out of style, but it's a sentimental gesture to keep it. The kids think it's pretty cool too.
We did the Elf on the Shelf for the last few years, but this year we're not (My kids are older now anyways). There is absolutely nothing wrong with doing it, I just felt like we needed something a little different. Since we are Christian we went with the 25daysofchrist.com ornaments.
They come unfinished so you can make them your own and also come with a booklet that has scripture references to both the New Testament and The Book of Mormon. We are going to double up next week to start it because our older 2 have been in Arizona this week. I am excited to focus more on why we celebrate Christmas this year.
 
 
Find somewhere to give
I am absolutely, 100% into giving more than receiving. It might not seem that way to the people in my family, but that's because most of what I give goes to those that absolutely need it. I have the kids brainstorm with us to find out how we can help others and sometimes it's how they can help the members of our own family. Usually it's service oriented (because that's my love language) and rarely has anything to do with "wants", but rather has to do with "needs." Find somewhere to give to others. We are so blessed and we have too much. It's better to give to those who truly need it rather than having a hundred presents under the tree.
 
Be purposeful about your family traditions. Even if you're the only person in your immediate family, find things that you can do that make the holiday season a joy to you and to those around you. We are here to help others and to live in joy.
 
Lots of love,
Nicole

Wednesday, December 2, 2015

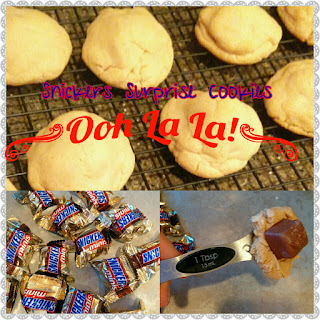
Snickers Surprise Cookies

This is another recipe from Judy :).

I made these cookies for my friend who recently had surgery. I brought her some Sausage Tortellini Soup and Parmesan Rolls as well. We've had a huge bag full of miniature sized Snickers staring at me for the last couple of months. I decided it was time to put them to use!

These are super delicious and fairly simple to make.

Snickers Surprise Cookies

Ingredients:

1 Cup of Butter
1 Cup of Peanut Butter
1 Cup of Sugar
1 Cup of Brown Sugar
2 Eggs
2 tsp. of Vanilla
3 1/2 Cups Flour
1/2 tsp. Salt
1 tsp. Baking Soda
2 pkg. of mini Snickers

Directions:

In your mixer combine butter peanut butter, and sugars. Slowly add in eggs and vanilla.


In a separate bowl whisk together the flour, salt, and baking soda. Slowly and carefully add the flour mixture to the dough. Mix well.

Take a Tb. of dough and shape it around a mini Snicker. Roll into a ball. Continue with the rest of the Snickers until you run out of dough.


Bake at 350* 10-12 minutes.

And then try not to eat all of them :)

Enjoy!

Saturday, November 28, 2015

Turkey Noodle Soup: A great way to use those Thanksgiving Turkey Leftovers

My Savvy Stoker Sister Judy made two kinds of Turkey Noodle Soup for the whole Stoker clan last night. They were both yummy. To suit everyone's taste she made a creamy kind and also a broth kind They are similar to Grandma's Creamy Chicken Noodle Soup and our Healthy Chicken Noodle Soup.

Her creamy Turkey Noodle soup was the same as Grandma's Creamy Chicken Noodle Soup, except you add the turkey instead of chicken.

The broth soup was different:

For Judy's Broth Turkey Noodle Soup she boiled the bones of the turkey with some onion, carrots, celery, 1 tsp. of thyme, salt and pepper, and 1 Tb. of parsley for 4 hours.

Then she removed the bones and strained the broth through a cheese cloth.

Add equal amounts of beef and chicken to the broth and more salt and pepper if needed. Then add cooked carrots, onion, celery, noodles, and turkey. Enjoy!

What a wonderful way to end Black Friday Shopping and a delicious meal to eat on a cold winter's night. She also paired the soups with some tasty "Monkey Bread" which she will have to do a post on someday, because they are so good!

Thanks, Judy!


Wednesday, November 25, 2015

Packing Tips

One of the sisters asked me to post about packing. I just moved for the second time in 2 years so it's nice and fresh in my mind. (Meaning I have nightmares about it still)

  • GETTING STARTED    If you're selling your home take down all your family and personal items. I know your family is beautiful, but strangers have a hard time imagining themselves in your home when all of your personal things are out. 
  • AFTER IT SELLS    As soon as you really know you're moving, whether it's selling your home or giving your notice on a rental, it's time to start taking decorations down. Take everything off the walls first so you can patch and paint all the holes. WHY? Because you're a decent person and it's the right thing to do. Also, you don't need your decorations to function as a human being and you really do have a month's worth of packing ahead of you. WASTE NO TIME BECAUSE INEVITABLY SOMETHING WILL COME UP THAT PUTS YOU BEHIND. You want to give yourself some cushion so that when that weekend with the family shows up unexpectedly you don't feel like you're a crazy person when you get back to packing. 
  • YOU NEED A TAPE GUN Whether you buy one or borrow it from a neighbor, packing is so much easier with a tape gun. We are a family of 6 and we went through 5 rolls of tape.
  • DON'T BUY BOXES  Utilize ksl or craigslist and see if anyone is giving their moving boxes away. Also, go down to your local stores at re-stocking time and get some of theirs. I've found that calling and asking them to save them isn't as effective. There are a lot of people who work in that store and the message might not make it to everyone. If you buy moving boxes it will cost you more than you have budgeted for such a thing, I promise. A wardrobe box runs around $13 brand new. (YIKES) For my family of 6 we used around 100 boxes. 
  • YOU NEED LESS THAN YOU THINK  You really don't need all those extra dishes or half of your clothes during your transition. Pack it all up. Label everything in mild detail so that it will be easier to sort into the new house. Don't leave a ton for boxes when the neighbors come to help you move. Be organized and efficient. Moving is so hard and so stressful, but you can make it easier on you and everyone else by being ahead of the game. Make sure that the last 2 days are paper plate days so that helpers aren't packing your breakables. They are not something to be hastily packed and you want to do it yourself.
  • HAVE A BUDGET FOR EATING OUT  There are a few days there where you will be unable to cook (or too tired to do so). Make sure you put aside some money for grabbing pizza or Cafe Rio for your family. 

Moving is hard and expensive! Make sure you ask for help when you need it and you have a few hundred dollars saved up beforehand for those unexpected expenses. We are in transition right now and hoping to be in our new home soon. Hopefully for longer than 2 years this time. ;) We go where the work is though.  Hope this helps.
Lots of Love,
Nicole

Tuesday, November 24, 2015

Mom's Mouthwatering Roast, Mashed Potatoes, and Gravy (Lindsay's Version)


Maybe my whole family has a huge iron deficiency, or maybe my mom is just a really good roast maker. Every time I hear we are having roast at my mom's house, I leap for joy. Its the best comfort food in the world! I know my family feels the same way. Its the most requested birthday dinner for sure!

And its really not that hard to make! I think we all make it a little differently from each other since a lot of the directions my mom gave me say "to taste". But what I made tonight came pretty darn close to my mom's yummy creations!

Ingredients:

For the Roast:

Rump Roast
sorry this is sideways!
Salt and Pepper
Olive Oil
Water (I used 3 cups)


For Gravy:


Water from cooking the roast
3 Tb. of Cornstarch mixed with a little bit of water
3 Beef Bullion Cubes
Salt and Pepper


For Mashed Potatoes

5 Russet Potatoes
4 Tb. of Butter (half a stick) softened and cut into chunks
1 cup of milk
1/2 cup sour cream
Salt

Directions:

Roast:

First cut all the gross fat off of your roast. Yuck!

Next rub salt and pepper all over your roast. I put some on a plate and just rub the roast around on it.


In a large heavy pot warm up a small amount of olive oil to medium high. Then brown the outside of your roast forming a pretty brown crust.


Now pour in some water making sure it covers about a third of your roast. I used 3 cups.
Then I got the water to bubble before putting the lid on and turning the heat down to low. Then just let it simmer for 5 hours! Your house will smell delicious.

For the Mashed Potatoes:

Peel your potatoes and then cut up into equal sized chunks-about 2 inches big.

Put them in a large pot and cover them with COLD water. Have just enough water to cover them. Add in 2 Tb. of salt and stir around.

Cover and bring to a boil. Then uncover and let simmer for about 15 minutes or until potatoes get tender. Don't overcook them! Test with a knife periodically.
When the potatoes are done, drain the water out and then you are ready to add your other ingredients and mash! Add in your chunks of room temperature butter first, and stir around coating your potatoes. Then add your milk or cream (up to a cup). I like to have my milk or cream be warmed up too,  and your sour cream (optional). I've even thrown in some cream cheese before! Yum!  Mash your potatoes however you choose. Stop and taste to see if it needs salt. If the texture is too thick you can add more milk, etc. Kind of play around with it until it is perfect for you.
butter


Gravy:

When the roast is done cooking take it out of the pot and set on a plate and cover with tinfoil to keep warm.

Bring the water the roast was in to a boil. Add in some bullion cubes (I used 3) and some salt and pepper. Mix up 3 Tb. of cornstarch with a little bit of water and mix in with the gravy. Stir and get it to the flavor you like. Reduce heat back to low once the bullion cubes are dissolved and the cornstarch is all mixed in.


cornstarch and water


beautiful and so yummy!
Now you are done and you can enjoy your delicious meal!
You have to make a gravy volcano in your potatoes :)

My taste buds were thrilled! I love mixing it all together.

Thanks for reading!